Manjaro 22.1.3 Dual-Boot Installation Guide
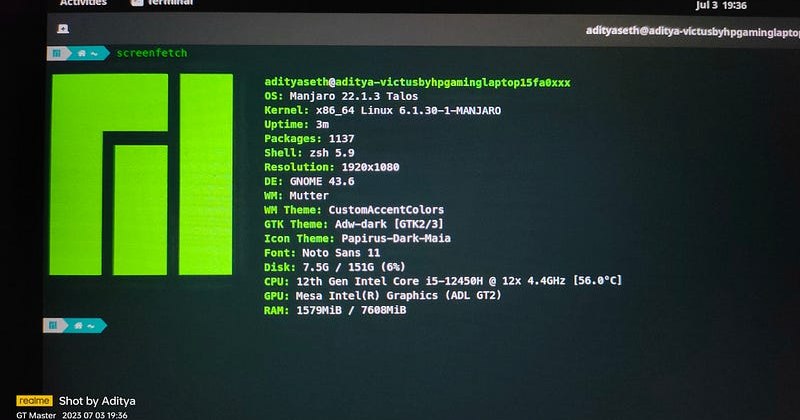
Here are the step by step dual-boot installation guide for Manjaro OS ->
For the record, I will be installing Manjaro Gnome-22.1.3 because I love Gnome :)
# Step 1
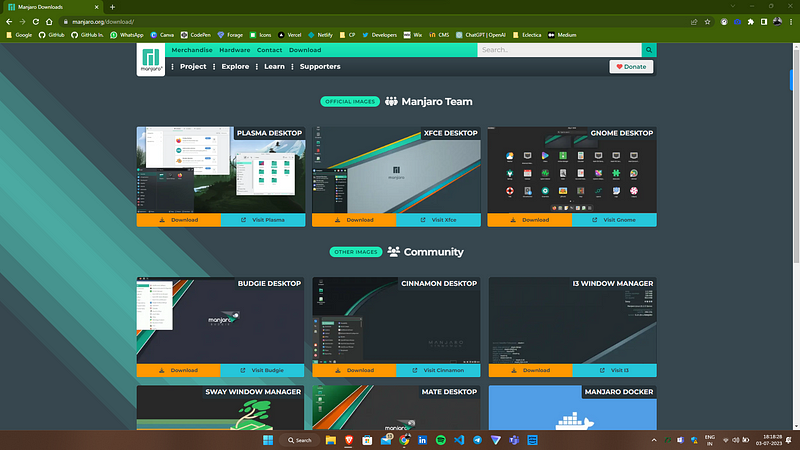
Go to the download page : Manjaro OS
# Step 2
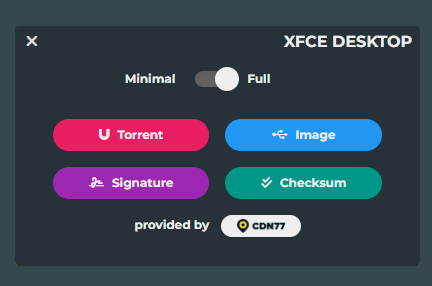
Select your preferred Manjaro installation with the desired desktop environment. Click on the “Image” button.
# Step 3
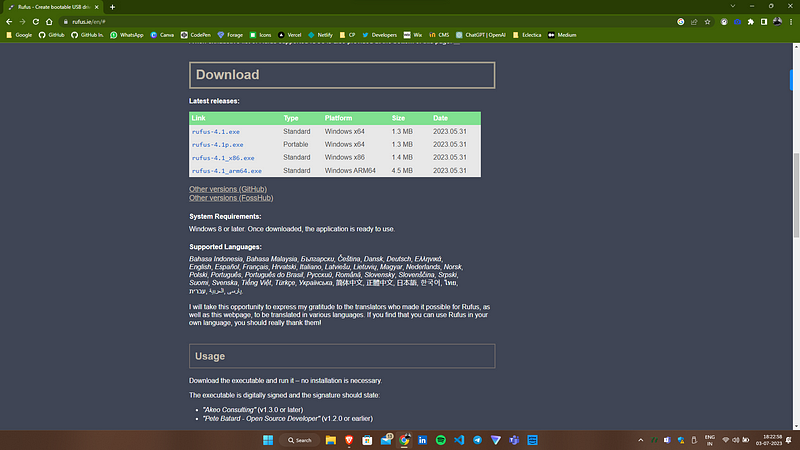
Whilst it is being downloaded, go to this website and download the latest version of Rufus (4.1.exe whilst this article is being written)
# Step 4
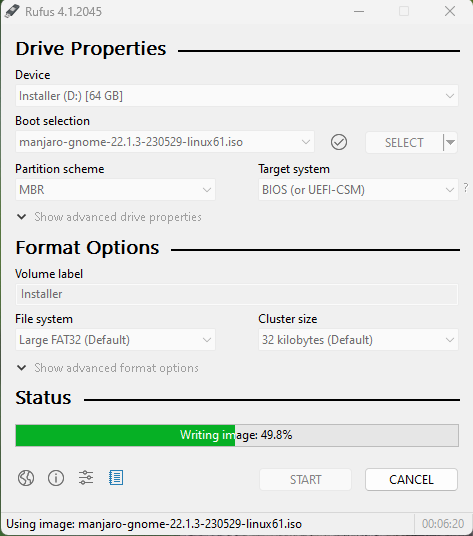
After downloading both the files (Rufus set-up and the Manjaro iso file), insert the USB drive and launch Rufus. Select the ISO file and start flashing the iso file on the USB drive.
# Step 5
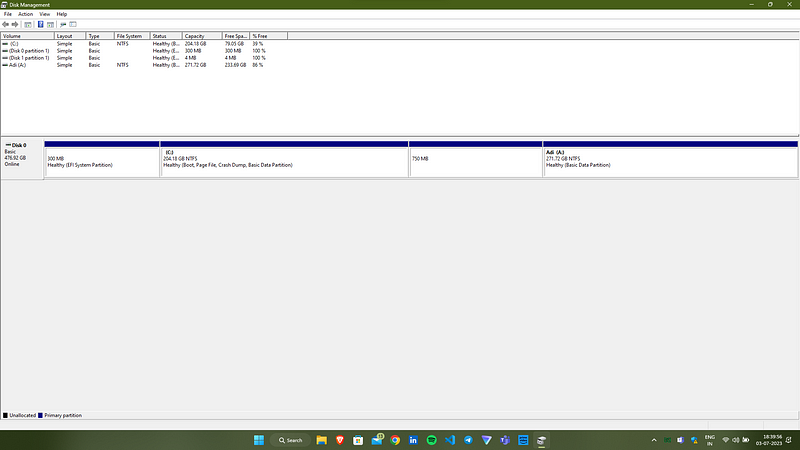
Now, while the USB drive is being bootable with the Manjaro ISO file, let’s adjust our preliminary partitions. Go to “Search” and then open “Create and format hard disk partitions”. Launch that and let us examine the partitions first.
# Step 6
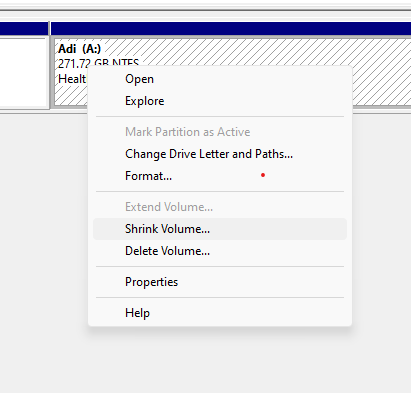
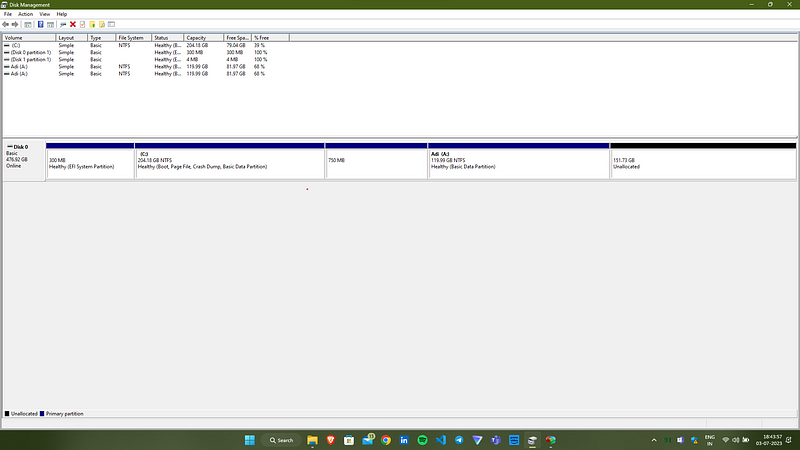
Shrink the hard disk drive and free at least 120 GB+ space for the Manjaro installation.
# Step 7
After unallocating the space, and after the USB drive has been made bootable, go to “Settings->Recovery” and click “Advanced Restart” to restart into Recovery mode.
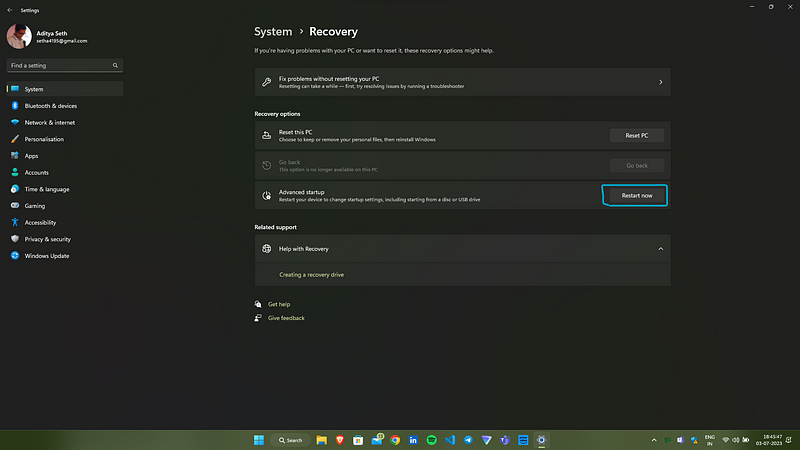
# Step 8
After launching into Recovery mode, select “Use a device” to boot from the USB drive.
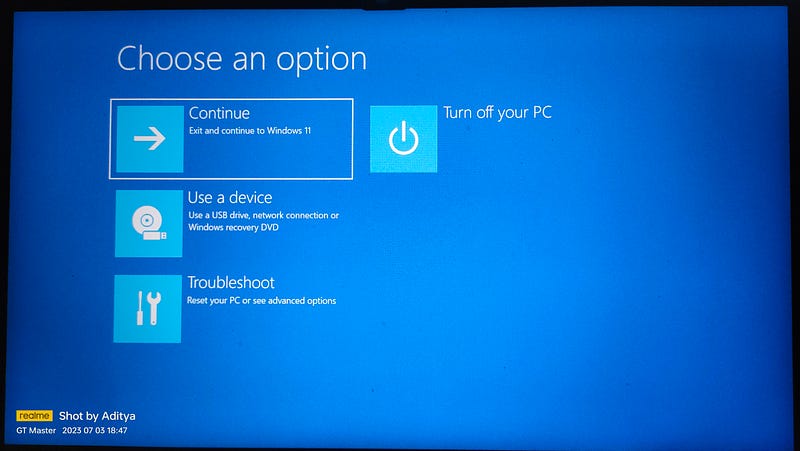
# Step 9
After selecting the USB drive, select the USB drive to boot from there ->
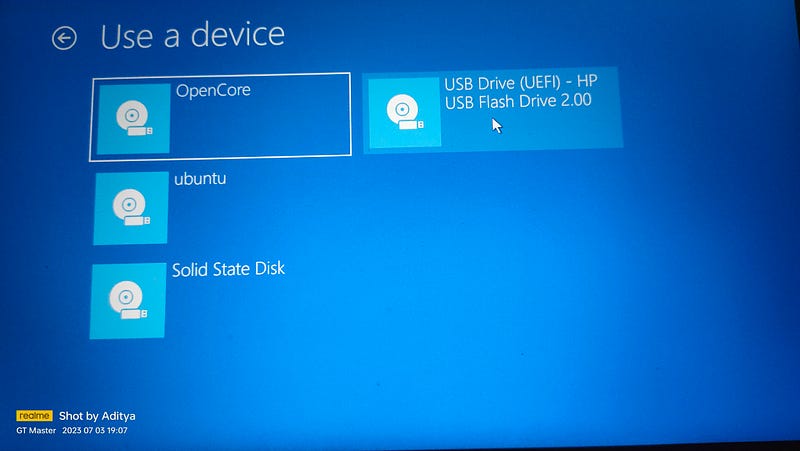
# Step 10
After clicking that, the boot up screen will boot up from the drive and display. The choice of whether to use the free or proprietary drivers actually boils down to how you intend to use the machine. If you’re into gaming or CAD, then you’ll be far better off with the proprietary drivers, but if you don’t have those requirements, then you might as well use the free drivers.
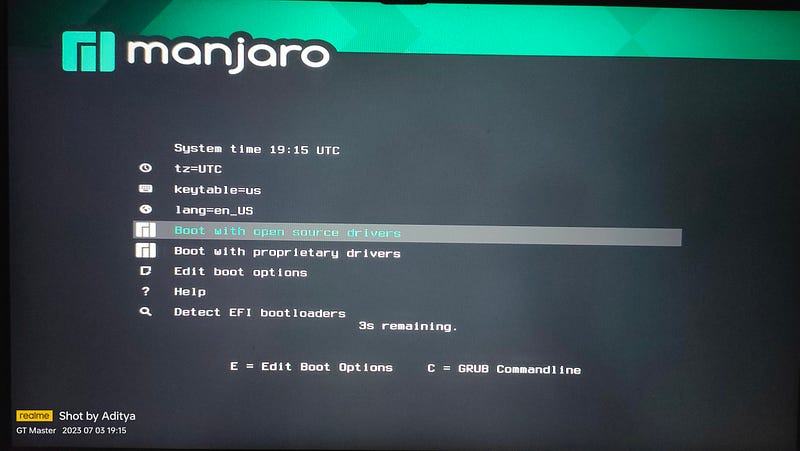
# Step 11
After selecting the option, the installer screen pops up. Click on “Launch Installer”
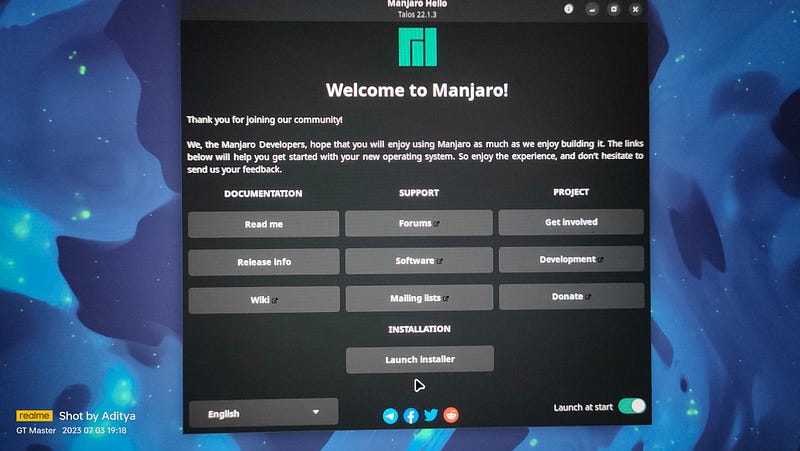
# Step 12
Make sure you are connected to the internet otherwise none will work.
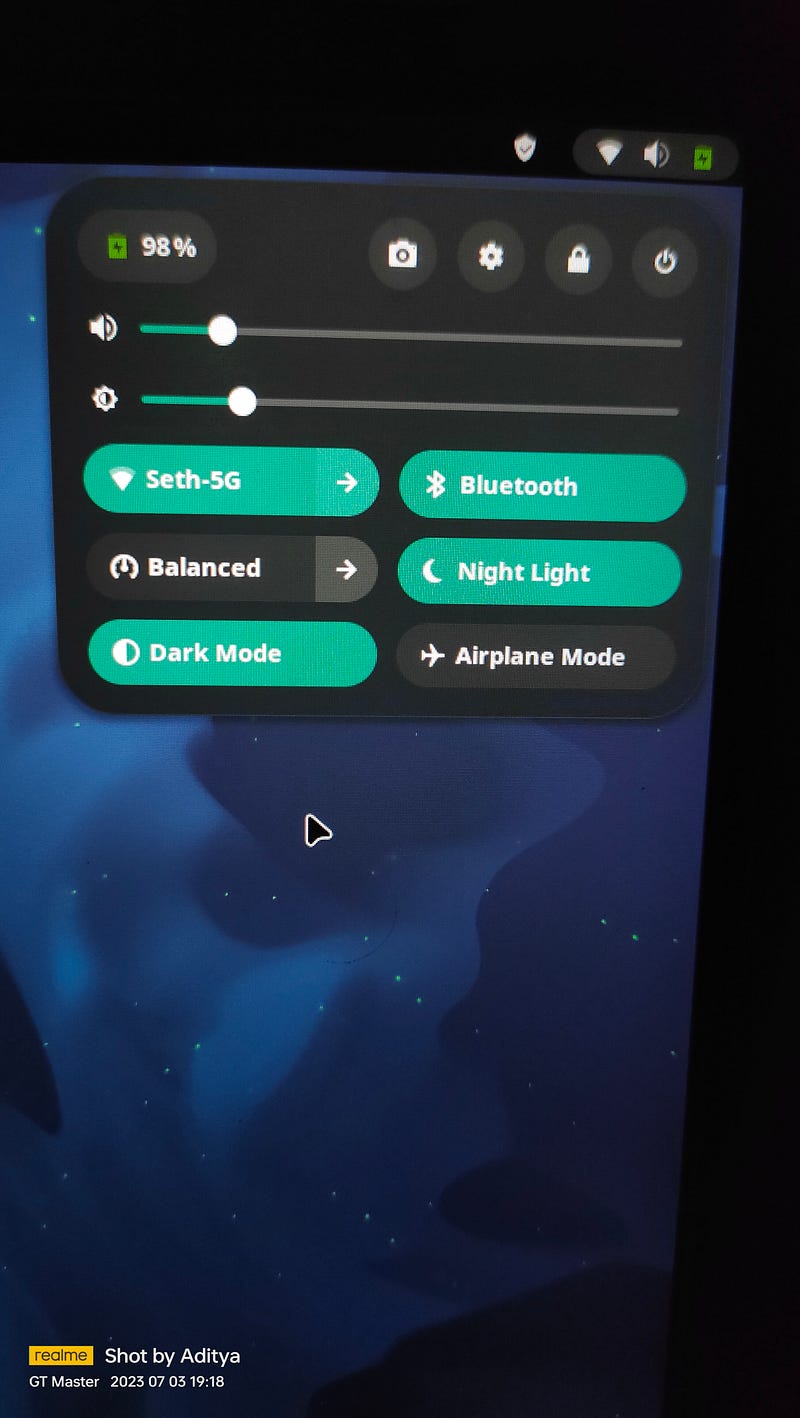
# Step 13
After clicking on “Launch Installer”, advance to the next steps. You’ll be greeted with the “Manjaro Linux 22.1.3 Talos installer”
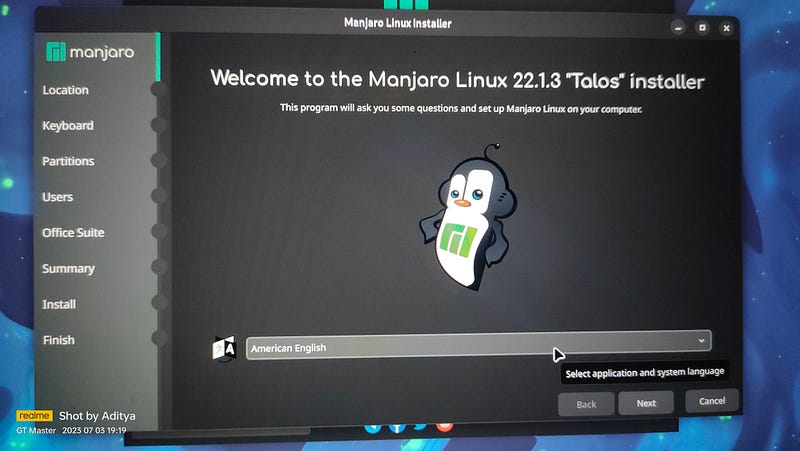
# Step 14
Next step ensures the location, so make sure to select the proper location, of course. After setting up, click on “Next”.
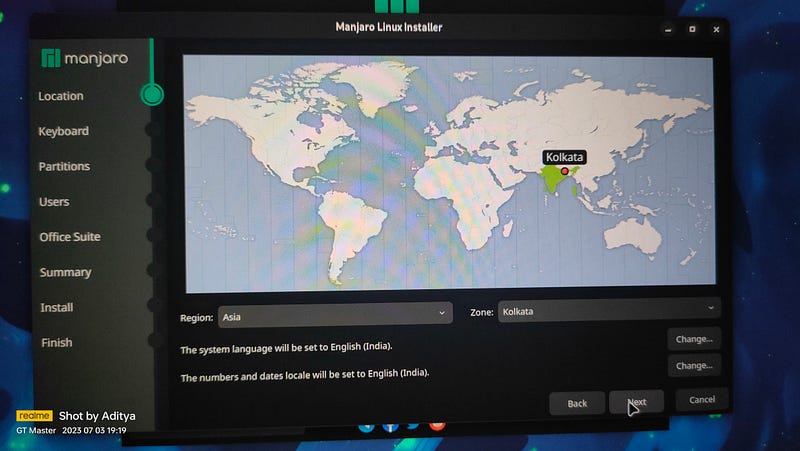
# Step 15
Now comes the options to set up the partitions which would be used by the Manjaro OS. Select “Manual partitioning”. It actually helps us get a better idea and more control. Click on “Next”. The next steps are gonna be fun XD.
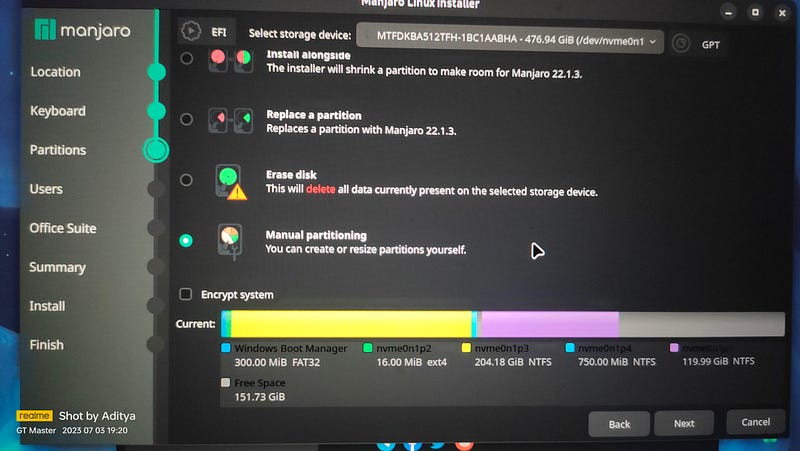
# Step 16
Double click on the free space for creating a new partition or click on the “New Partition Table”.
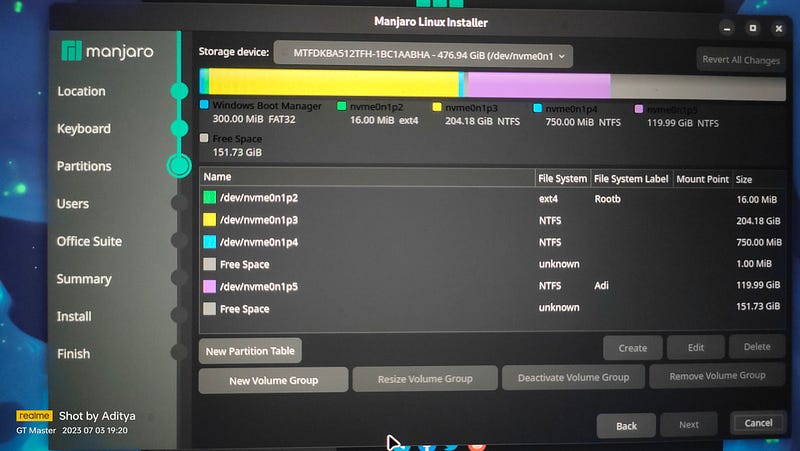
# Step 17
We have to create three partitions for the OS to operate. The unallocated space from Step 6 will be used in this and further steps.
- /boot/efi partition - 512MB
- swap partition - 2048MB
- /root partition - remaining space
To create the boot partition, click on the “New Partition Table” button and the pop-up window will be displayed as shown. Follow the steps shown. Specify the memory size of your partition, file system type, and mount point and click “Ok”.
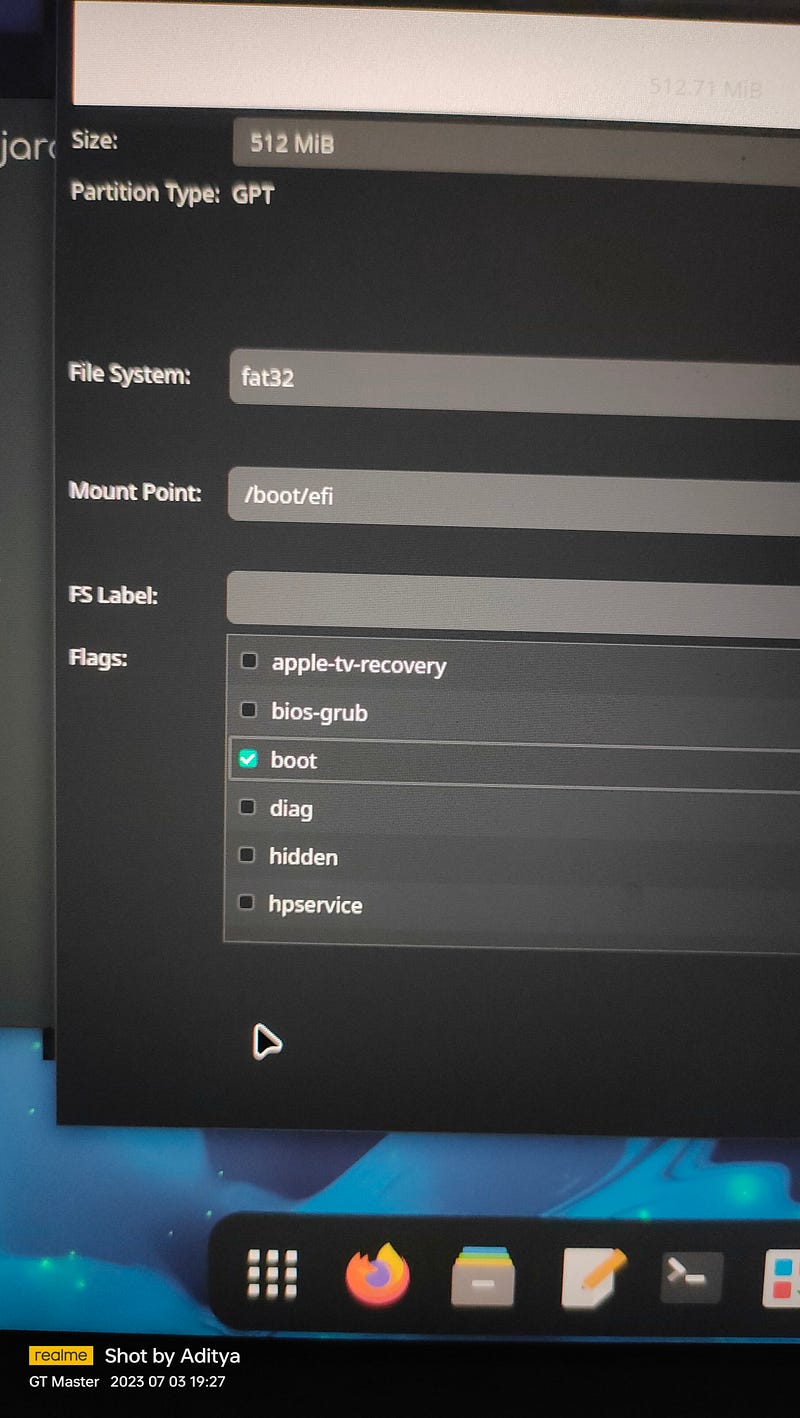
# Step 18
To create swap space, again, click on the “New Partition Table” button and follow the steps shown. Notice that when you select the file system as “linuxswap” the mount point is grayed out and cannot be created.
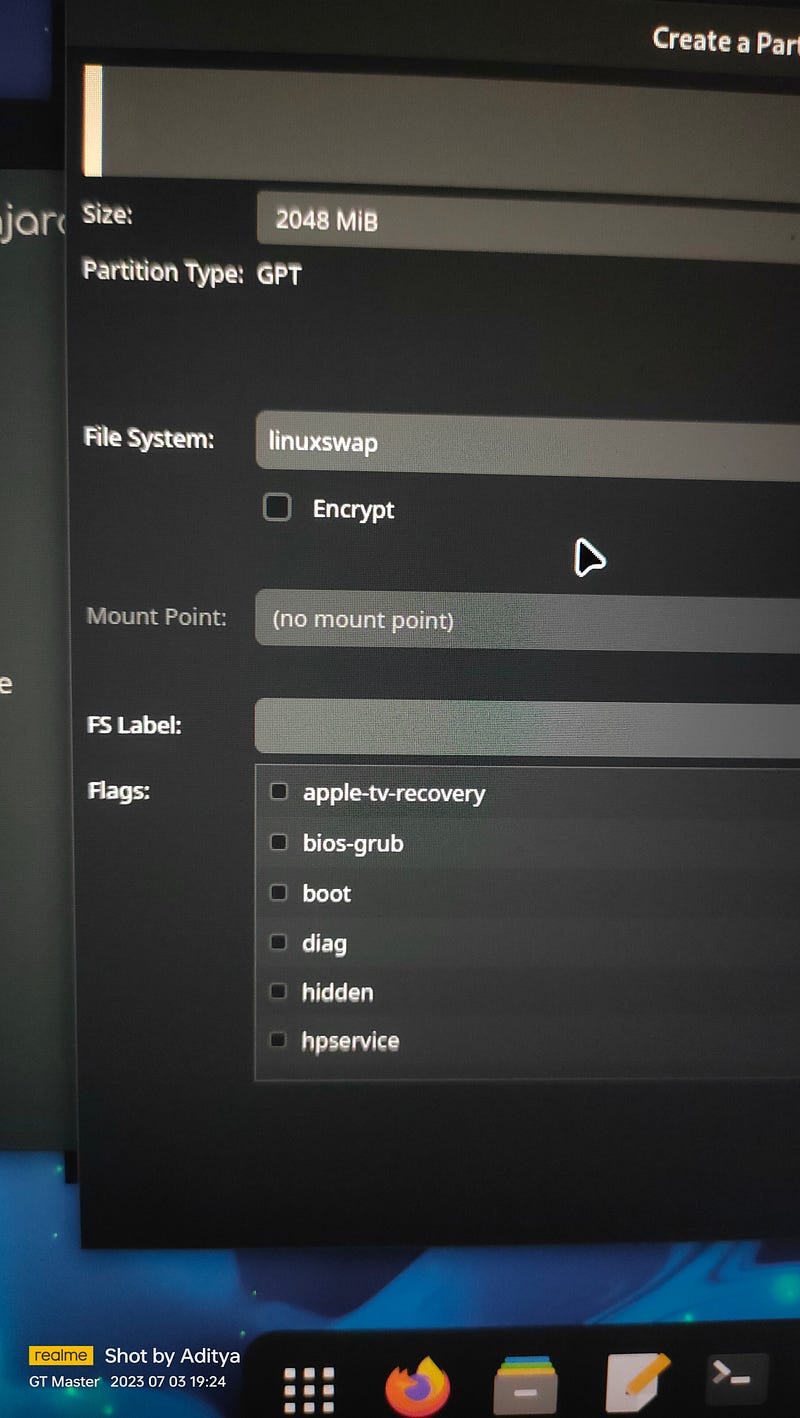
This is because Swap is a virtual memory space that is used when the main memory begins to get used up and not a mount point that can be used for data storage.
# Step 19
Use the remaining free space as root partition with mount point as “/” and ext4 format. I will not be going to put a picture to verify. Do it yourself :)
After creating the three partitions successfully, the entire storage disk will look like the following:
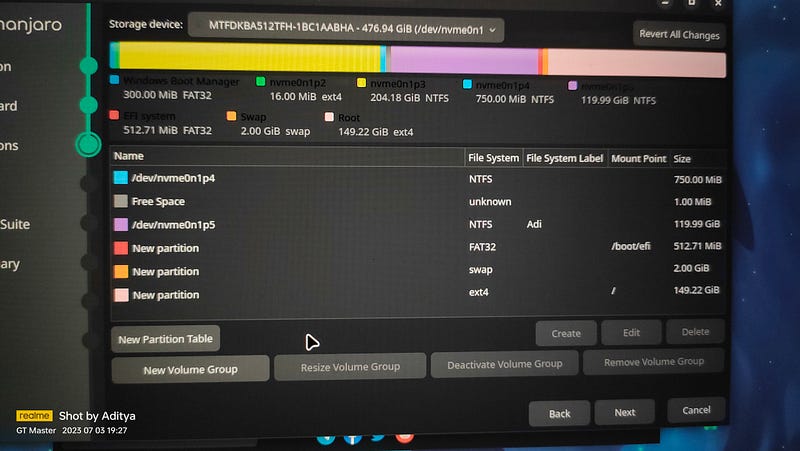
After setting up, click on “Next”.
# Step 20
Set up the name of the account, password and everything in the next step.
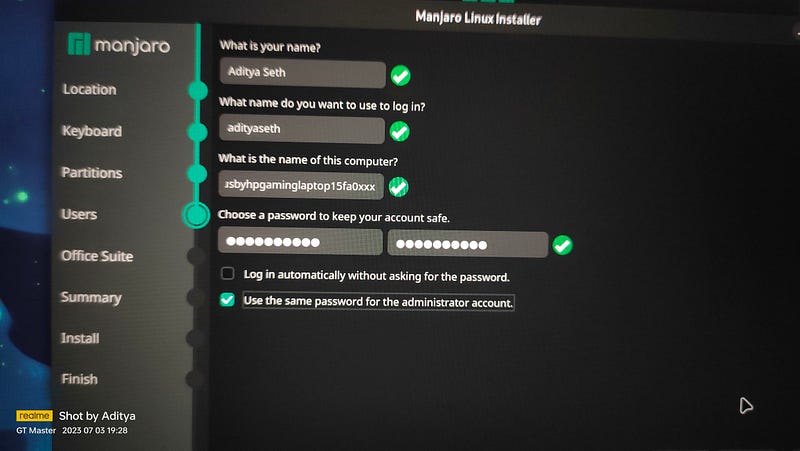
After setting up, click on “Next”.
# Step 21
Click on your desired office suite if you want. There is also an option of clicking “No Office Suite”.
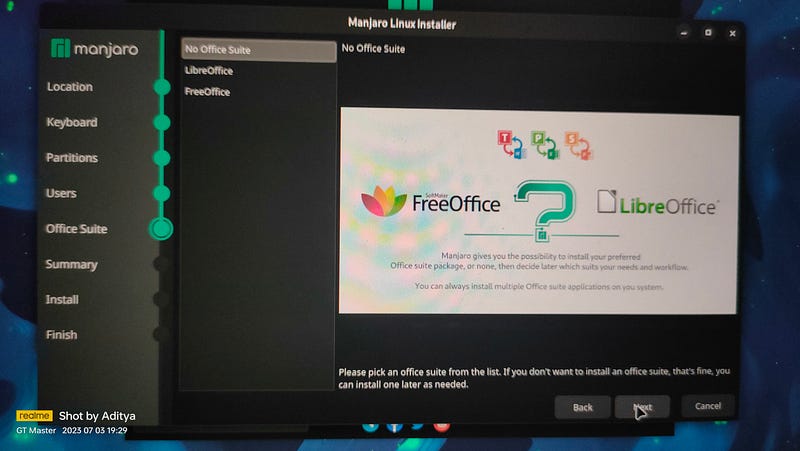
After setting up, click on “Next”.
# Step 22
Now the next page will provide you an overview of what will happen if you click on “Install”. Basically, if you have followed the above steps properly, everything should be alright. After examining everything, click on “Install”.
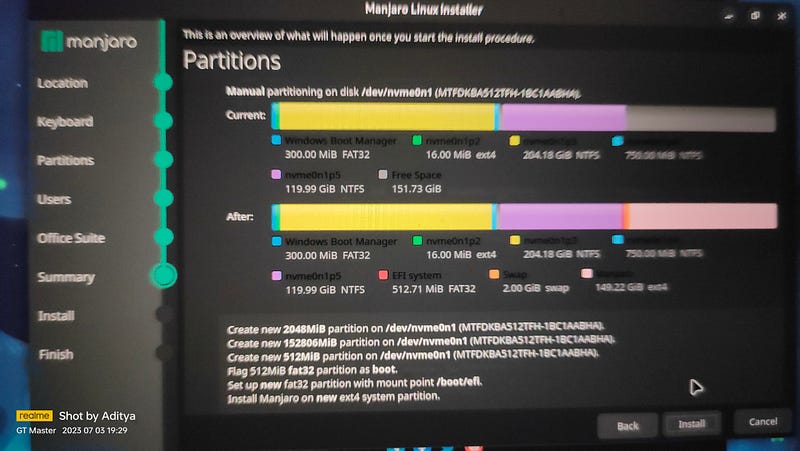
# Step 23
The install screen will appear then (without any errors):
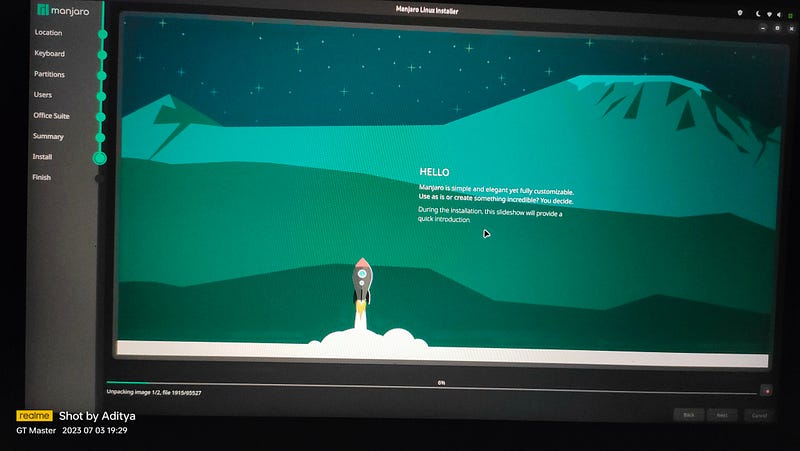
Give it adequate time to install. Don’t switch off your laptop/PC whilst it is being installed.
# Step 24
After the installation has been completed, the following screen will appear.
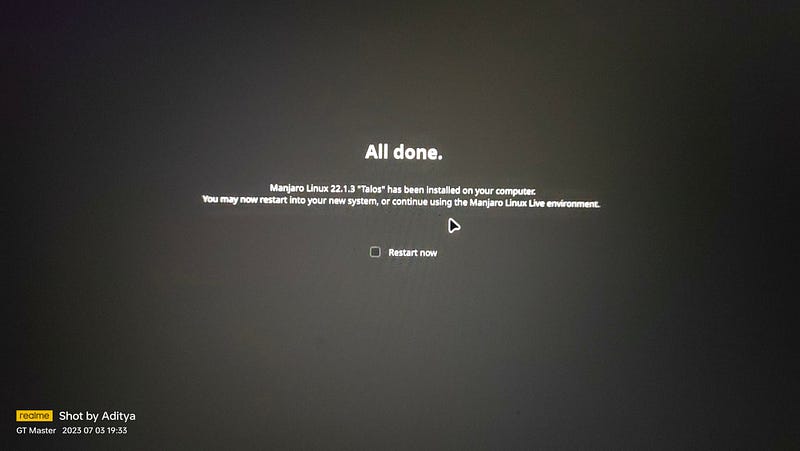
Select “Restart now” and remove the USB drive. The laptop/PC should restart and the Manjaro Boot Manager should appear.
# Step 25
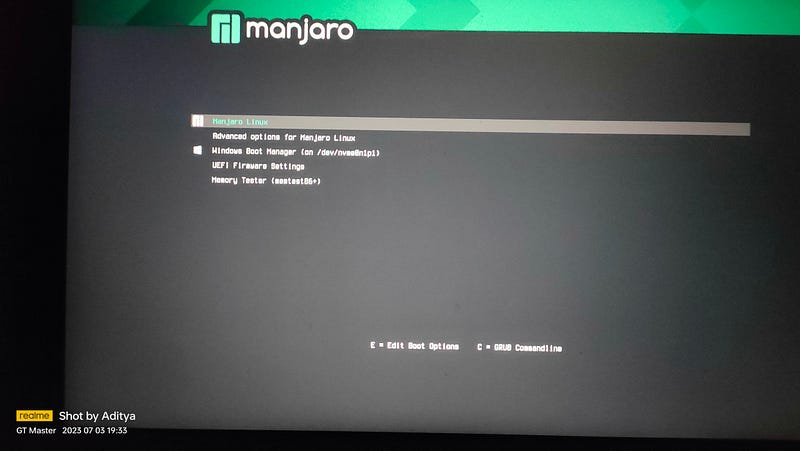
This is the Manjaro Boot Manager. This will appear everytime you switch on your laptop/PC. If you want to log in to Manjaro, click on “Manjaro Linux”. If you want to log in to Windows, click on “Windows Boot Manager”. As simple as that.
# Step 26
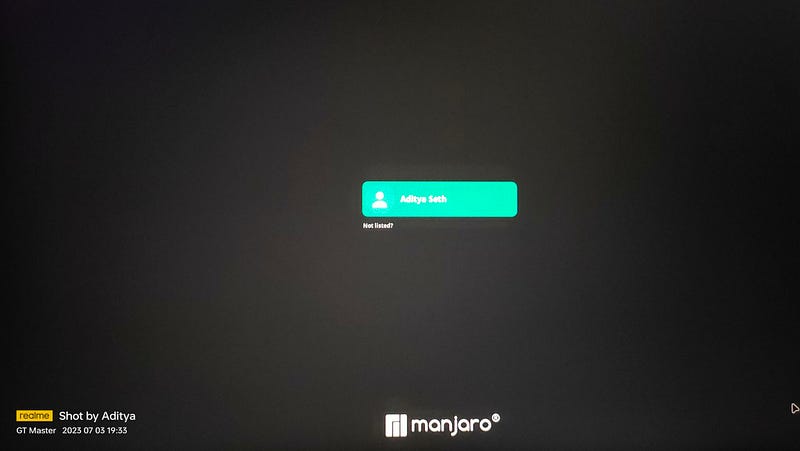
For logging in to Manjaro, the screen will appear like this ->
# Step 27
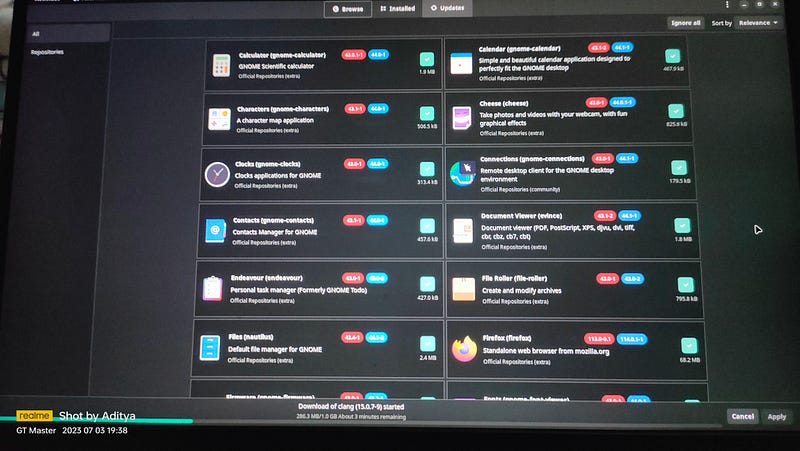
There are a VAST amount of updates remaining (accessible through the upper right corner), so make sure to update them as well.
# Step 28
For the final verification and the last step, open “Terminal” and run the following command -> **sudo pacman -S sceenfetch** for screenFetch or **sudo pacman -S neofetch** for Neofetch. Press “Y” wherever necessary.
After successful installation, write “screenfetch” or “neofetch” in the terminal and press Enter. The following image, if appears -> means that the Manjaro OS installation is successful.
That’ll be all.
Upcoming Articles:
- The Potential of Quantum Cryptography: Secure Communication in the Quantum Era
- Quantum Cryptography Protocols: Exploring Beyond Quantum Key Distribution
- Quantum Cryptanalysis: Unraveling the Challenges of Breaking Quantum Codes
Published Articles:
- Manjaro-22.1.3 Dual-Boot Installation Guide
- Exploring the Rising World of Biohacking: Enhancing Human Abilities through Technology
- Quantum Cryptography: Augmenting Security in Distributed Ledger Technology through Synergistic Integration with Blockchain
- Debate Article: It’s a rule so it’s right . . . right ?
_______________________________________________________________
If you want to contact me, feel free to drop an e-mail at [email protected] or check out my website at adityaseth.in :)
Also, here’s my LinkedIn.Thank you everyone for reading,
Over and out,
Aditya Seth.
Frequently asked
- What Manjaro edition does this guide install?
- The guide walks through installing Manjaro GNOME 22.1.3 (codenamed Talos) in a dual-boot configuration alongside an existing Windows installation.
- What tool is used to create the bootable USB drive?
- Rufus, a free Windows utility, is used to flash the downloaded Manjaro ISO onto a USB drive before booting into the installer.
- What partitions does the guide create for Manjaro?
- Three partitions - a 512MB /boot/efi partition, a 2048MB swap partition, and a root partition using the remaining free space formatted as ext4.
- How do you verify the Manjaro installation succeeded?
- Run sudo pacman -S screenfetch or sudo pacman -S neofetch in a terminal, then type screenfetch or neofetch - a correctly rendered system-info banner confirms the install worked.
Comments